Did you notice that July is almost over? And that Christmas is right around the corner? Well, it is. And because I always like to make a lot of handmade gifts, I have to start early.
A couple of weeks ago, I discovered
Patience Brewster and decided to join them in celebrating Christmas in
July! And so scented ornaments came to be!
Patience Brewster is a wonderful artist and designer of handmade gifts and ornaments. It you're not familiar with Patience, check out her website. They are known for their whimsical ornaments, but me being me, I also loved their stationery collections!
Anyway, this was an opportunity I couldn't miss. Last year, while going through my Handmade Christmas series of posts, there was one project that never got completed: a set of cross stitched scented pillows that I started making for my mother in law but didn't have time to finish before Christmas. Ever since, those cross stitched squares looked at me from the unfinished projects pile and begged me to just get them done.
And I kept postponing, because I knew I had time before Christmas and I was focused on other projects. Well, Marietta's e-mail was the click I needed. She reminded me that there wasn't really that much time left until Christmas, and gave me the push I needed to get those little pillows made.
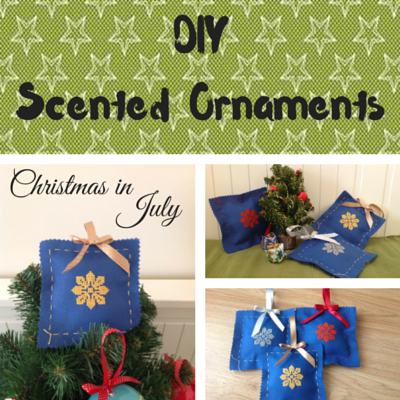
While browsing through the Patience Brewster website, I had the sudden inspiration of turning the scented pillows into scented ornaments, that you can hang on your Christmas tree and then, once Christmas is over, still use in your closet or linen drawers. It's a two-in-one and makes the perfect handmade Christmas gift!
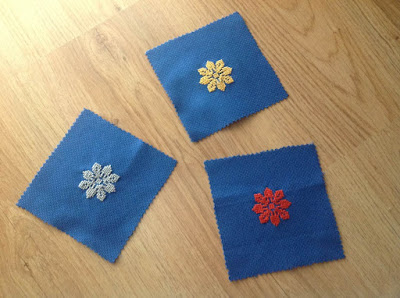
I started with three cross stitched squares of dark blue aida fabric and the same design in red, silver and gold (I know I have the template somewhere, but I couldn't find it this weekend and I didn't want to delay this post anymore; when I find it, I'll add it here).
In addition to that, I used matching ribbon and a light weight cotton crochet yarn...
...some store bought scented sachets and a bit of polyester filling (not pictured).
The back of the scented ornaments is made with the same aida fabric, just not cross stitched. I cut the squares using pinking shears to avoid fraying and sewed them together using the crochet yarn.
On top of the square I added a folded piece of ribbon for hanging, and I left a little opening at the bottom, that I closed after putting in the scented sachets and the filling.
And then, for good measure, I added a little bow on top too!
Finished!
Our Christmas tree is in storage, so I had to make do with the bit of Christmas stuff I had on top of a shelf in our den.
Luckily our old table top tree (the one we bought for the first Christmas after we got married and that was the only tree we ever had until after my daughter was born) was there, so I used it for an impromptu photo shoot, just to show you how the scented ornaments look like hanging from a Christmas tree (even though clearly a bit out of proportion).
To be honest, the cross stitch part took longer than all the rest. Once I figured out exactly how I wanted the scented ornaments to look like, they came together pretty quickly.
And if you want to skip out the cross stitch part, I'm sure they would look cute too just made out of Christmas fabric...or shaped like little pine trees... and since they can be used all year round, I'm pretty sure I'll be making more of these!
How about you, are you also celebrating Christmas in July? Even if you aren't actively making anything for Christmas, don't forget to check out Patience Brewster for inspiration.
Oh, and they are also having this great Instagram giveaway. Unfortunately, I'm not on Instagram yet, but if you are, check out all the details here. It runs until July 31st, so there is still time for you to join!
Have a great week!


Your scented ornaments are so nice and must smell great. Thanks for sharing at our Cooking & Crafting with J & J.
ReplyDeleteThank you Julie!
DeleteI really like this idea! Can't wait to try it in Nov. L
ReplyDeleteThank you!
DeleteI love the idea of scented ornaments, brings back good memories of my grandmother and the special Christmas Ornaments she would make.
ReplyDeleteThank you for sharing with the Clever Chicks Blog Hop! I hope you’ll join us again next week!
Cheers,
Kathy Shea Mormino
The Chicken Chick
http://www.The-Chicken-Chick.com
Thank you Kathy!
DeleteAww...these are so cute! Love them!
ReplyDeleteThanks for joining Cooking and Crafting with J & J!
Thank you Jess!
DeleteYour ornaments are lovely, and I love the idea of adding the smell of Christmas! Thank you for sharing at #OMHGWW! Hope to see you next week!
ReplyDeleteThank you Christine!
DeleteThese are adorable! I bet they will smell wonderful, too :) It's amazing that July is about over!!!! Thanks so much for sharing at Together on Tuesdays :)
ReplyDeleteThank you Lisa!
DeleteI'm impressed with your make-shift Christmas set-up. What a smart idea, having a Christmas ornament double as something you can use throughout the year. These look great. Kudos to you for getting these down in plenty of time before Christmas, and ticking a UFO off the list.
ReplyDeleteThank you for stopping by!
DeleteThanks for sharing this Holiday craft diy at my new party I am co hosting weekly Dream Create and Inspire..
ReplyDeleteHugs Maria
Thank you Maria!
DeleteGreat idea! And so cute, too! :)
ReplyDeleteI absolutely love these! Pinned and tweeted. Thank you so much for bringing such a masterpiece to our party. I hope to see you tonight at 7 pm. We can’t wait to party with you! Lou Lou Girls
ReplyDeleteThank you Kimberly! I didn't have time to link up yesterday, but I'll be doing it today for sure!
DeleteWhat cute little decorations for Christmas!
ReplyDeleteThank you Connie!
Deleteohhh so pretty! love the blue - these will really show up against the tree and then easy to snag to hand out as a little surprise gift. So easy to customize too by using the cross stitch. Awesome!! thanks for sharing with Snickerdoodle!
ReplyDeleteThank you for the opportunity to share! have a great week!
DeleteI love the gorgeous snowflakes and making the ornaments scented was a great idea! Isn't it nice to cross one off your list? I need to do that with a few unfinished projects. Thanks for sharing with SYC.
ReplyDeletehugs,
Jann
Yeah, that moment when you finish one of those projects that were laying around for a long time is so fulfilling...Thank you for stopping by Jann!
DeleteThose are cute!! Looks good!! Thanks for sharing on My 2 Favorite Things on Thursday - Link Party!! Hope to see you again this week!! I pin everything on my 2 favorite things pinterest board!!
ReplyDeleteThank you Elaine! Off to check this week's party!
DeleteI love making sachets! These are so sweet and simple. Great idea to use them as ornaments.
ReplyDeleteThank you Kathleen!
DeleteSuch a cute idea! Thanks so much for sharing at Share The Wealth Sunday!
ReplyDeletexoxo
Lisa
Thank you Lisa!
DeleteThese are so cute! What a great way to get ahead!
ReplyDeleteThank you!
DeleteSuch a lovely idea and I love that you included the scent. I would give this a try, too!
ReplyDeleteThank you! They're fairly easy to make, the cross stitch is what took me longer to complete. But I'm thinking of making a new batch just using Christmas fabric...
Deleteloving these sachet ornaments! and you could pick your own color and scent! These will make great gift toppers too! Thanks for sharing :)
ReplyDeleteTeresa, These sachet ornaments are just too cute! Love them! Thanks for sharing with us at the Christmas in July Hop! Pinned :)
ReplyDelete