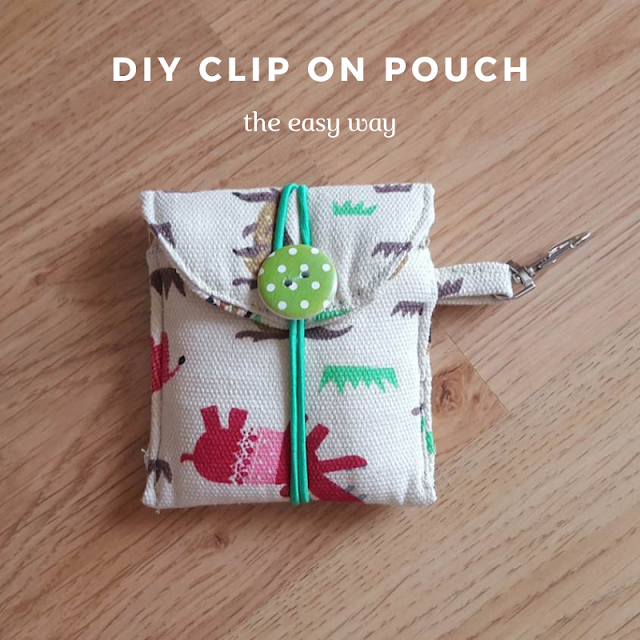
Hello, and welcome. Last week my son came home from school and proudly announced his maths teacher had told the class they could already use a calculator for some of the work they've been doing. So, we got him a small, simple calculator - green, of course, because it's his favorite color (luckily for me, it was actually the only color the store had when I stopped by...). The next step was to create a small pouch for the calculator, because the small solar panel wouldn't last that much mixed in with the pens and pencils in his pencil case (and also because mom loves making this kind of things...).
I let him go through my fabric stash and pick the fabric he wanted for the pouch, same with the button. And as an afterthought I decided to make the pouch a clip on, hoping it will be harder for it to get lost that way.
I let him go through my fabric stash and pick the fabric he wanted for the pouch, same with the button. And as an afterthought I decided to make the pouch a clip on, hoping it will be harder for it to get lost that way.
I didn't create a pattern for the pouch because size really depends on what you want to use it for, but there's a small tutorial below in case you want to make one of these pouches too.
What you need:
- two rectangles of fabric (exterior fabric and lining) for the pouch. They should be sized long and wide enough to cover the object you want to use the pouch for, envelope style (and don't forget to account for seam allowances). After cutting the rectangles, you may want to round up the top of the pouch a bit like I did (I used a round dish to create the shape).
- one piece of batting in the same size as the fabric. This is optional but advisable if you're making the pouch for a sensitive item like a calculator or a cell phone, as it adds extra padding.
- one button
- one piece of elastic long enough to go around the pouch folded in half (cut it only after you finish sewing the pouch to make sure you have the right size)
- one additional small rectangle or fabric or a bit of ribbon for the clip
- one clip
 |
| https://amzn.to/3Ha0iPZ |
Instructions:
- Place the two pieces of fabric right sides together, with the batting on top of one of the wrong sides
- With the smaller rectangle of felt, create a small ribbon (I folded the fabric bias tape like and then sewed on top) or get your piece of ribbon, fold in half with the clip in between, and pin in place (tucked between the right sides of the pouch fabric pieces and positioned in a way that it will end on one side of the pouch).
- sew the sides and the top, leaving the other short edge open. Turn inside out.
- Next, take care of the seam still open. Fold the edges inward and top stitch.
- Finally, fold the bottom of the rectangle to the size you want, pin in place and top stitch again the sides and the top. It should look like the one below:
- Fold the elastic in half and sew both edges together over the bottom of the flap:
- And finally sew the button over the edges of the elastic, effectively hiding them:
And your very own clip on pouch is finished! Here's how it should look, front and back:
This is a really quick way to make these useful pouches - they are great for a lot of things, and a lovely handmade gift too!
Have fun, and happy Monday,


This is very cute! I need to make something like this for my son's backpack. Thanks for sharing at #HomeMattersParty
ReplyDeleteThank you, for hosting and for stopping by!
DeleteI love this. Very simple and a great way to use my cotton scraps. I'm wanting to make a small pouch for my inhaler. Wish me luck ☺
ReplyDeleteGood luck! Though these are pretty easy to make, really!
Delete