After making two girl bags using someone else's patterns, I decided to come up with my own pattern.
Mostly, I was looking for a cute way to close the bag. Little girls are always jumping around and a bag that does not close is an invitation for them to spread its contents all over the floor every five minutes.
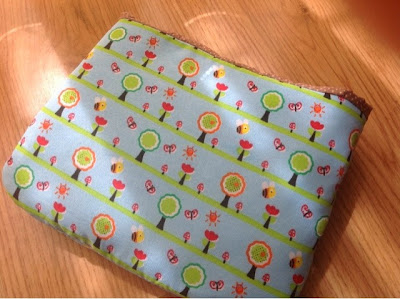
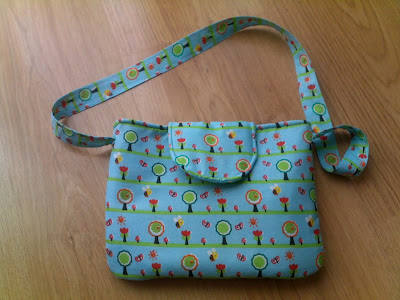
So I spent a couple of days testing sizes and closing flaps and this is what I came up with:

This time, I also made an effort to document the steps it took me to get to the finished product, in order to provide you with a simple (but long, bear with me) tutorial. So, if you want to make a similar bag, download the pattern here.
You with need to cut six bag pieces, two from the outside fabric, two from the lining and two from batting. If your exterior fabric has a pattern, try to cut both pieces in a way that the pattern matches on both sides once you sew the front to the back.

For the flap you will need to cut three pieces, one from batting and two from your exterior fabric. If you decide to add an inside pocket (marked as optional on the pattern), cut two pieces, one from the exterior fabric and one from lining. If you're very picky, you will also try to cut the flap pieces in a way that allows you to match the pattern of the fabric once the flap is attached to the bag.
Step one: pocket
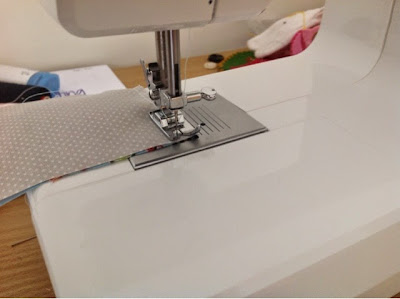
If you do not want to add a pocket, skip this step and go directly to step 2. If you decided to make a pocket, that is the first thing you will have to sew. Pin fabrics right sides together and sew around the edges, leaving an opening at the bottom.
Trim excess fabric, clip corners and turn inside out through the bottom opening.

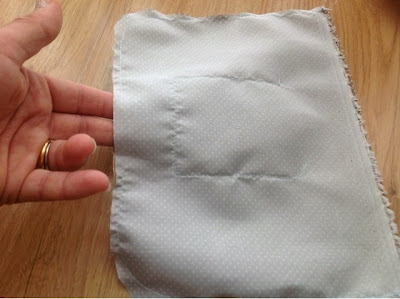
Pin the pocket to one of your lining pieces, making sure it is centered.

Sew around the sides and the bottom, taking care to close the initial opening.

Step two: body of the bag
Start by pinning the two lining pieces right sides together. Sew around the sides and part of the bottom, again leaving and opening. Don't sew the top.
Start by pinning the two lining pieces right sides together. Sew around the sides and part of the bottom, again leaving and opening. Don't sew the top.
Next, do the same with the exterior fabric. Pin right sides together and then lay the batting on each side. Sew around the sides and bottom. This time you do not need to leave an opening. Again, don't sew the top.
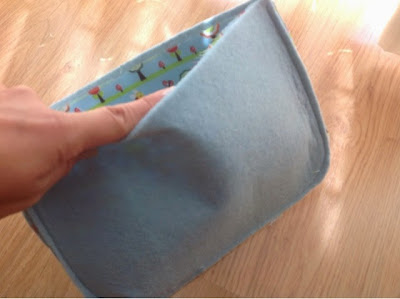
Trim excess fabric and turn inside out.

Insert the outer piece into the lining, matching both fabrics right sides together and sew around the top. Pull the outside piece though the bottom opening of the lining.
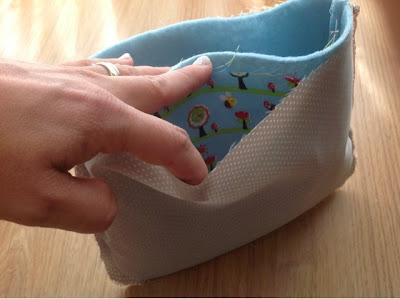
Hand sew the bottom opening shut and tuck lining back inside the bag.
Step three: flap
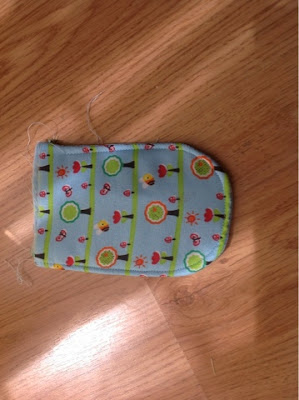
Pin flap pieces right sides together, with the batting piece pinned to what will be the outside of your flap (trust me, it does make a difference. If you pin it to the other side, the seams will show through the fabric and your flap will be sporting visible bumps).
Pin flap pieces right sides together, with the batting piece pinned to what will be the outside of your flap (trust me, it does make a difference. If you pin it to the other side, the seams will show through the fabric and your flap will be sporting visible bumps).

Sew around the sides and the bottom. Turn inside out and press it flat. Fold each of the top edges and tuck it into the flap. Top stitch.
Step four: finishing the bag
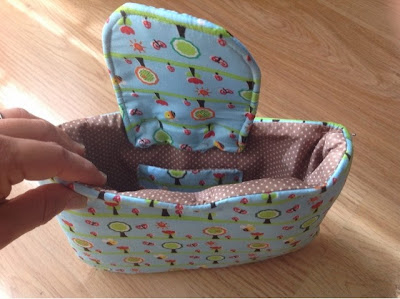
Pin around the edge of the bag making sure the the lining falls strait on the inside. Pin the flap as well, making sure it is centered.
Pin around the edge of the bag making sure the the lining falls strait on the inside. Pin the flap as well, making sure it is centered.

Top stitch around the top.
Step five: the strap
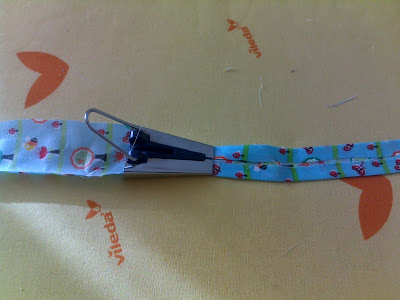
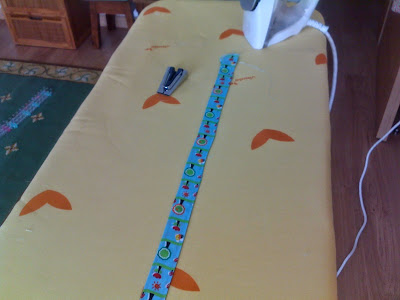
In all the bags I made, this has always been the most difficult step. With first one, I sewed the fabrics right sides together and then turned the strap inside out. But when I'm making the bags child-size, the strap is not wide enough to making the turning inside out an easy task. On the second one (this one), I discarded the two initial straps and, in despair, ended up using a matching ribbon. This time I used a different approach - a bias tape maker:
The end result? Not perfect, but not too bad either.
In any case, sew the strap the way you feel most confident about. Let me know if you have any good suggestions, since I will be testing the pattern again as soon as I can find the time. Attach the strap to the sides of the bag.
At the time I made this for may daughter, I calculated the length of the strap as approximately twice the width of the finished bag (35 - 40 cm), but depending on who you are making it for and your particular preference, you can have a shorter or a longer strap.
Step six: the snap
In order to keep the flap closed, sew or attach a snap in place.
In order to keep the flap closed, sew or attach a snap in place.
At this point, you will have a finished bag. See how the fabric pattern in the flap almost matches the rest of the bag? To be honest, I never thought I could pull this through until the very end...
If you're like me, however, you will take it one step forward and add some sort of embellishment.
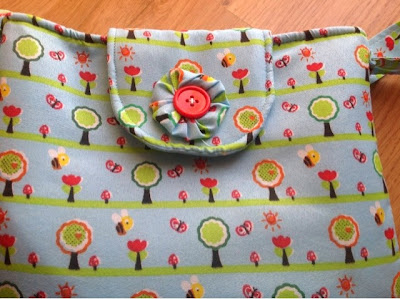
I added yo-yos and buttons in front of the flap and on each side (this can be useful if the seams attaching the strap are not very pretty and you need to hide them out).
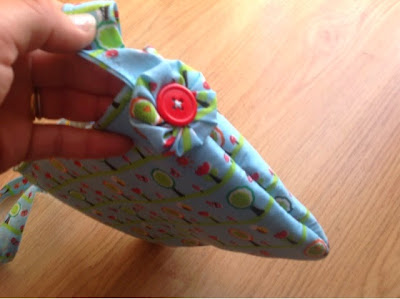
This is my first pattern and I do have some improvements I want to test, but overall I'm happy with the results. I hope you enjoy it as well.
Now let's see if I can make some matching accessories to go with the bag...
And in case you missed the link to download the pattern in the middle of all the text above, you can find it here.
This project was featured as part of AllFreeSewing's Top 100 sewing projects list for 2017. Yay!
Enjoy, and happy Tuesday,
This post may contain affiliate links. As an Amazon Associate I earn from qualifying purchases.
 |
| https://amzn.to/41SZNmF |





.png)
Hi Teresa, I love your little bag and I am sure my daughter would too. Thank you for the free pattern I will give it a try! I found you at "show me what you got"...Hope you have a nice day... Elisa (lemonandlimethyme)
ReplyDeleteThanks Elisa.
DeleteI'm still looking for ways to improve the pattern, so let me know if you have any questions or problems.
I hope you enjoy it.
All the best,
Teresa
Love the bag and thank you for the pattern print out!! I'm stuck of the length of the straps..any thoughts about how long the strap should be for a little girl?
DeleteMe too ..I wonder what would be the length of the strap
DeleteSorry for the missing length. At the time I made this for may daughter, I calculated the length of the strap as approximately twice the width of the finished bag, but depending on who you are making it for and your preference, you can have a shorter or a longer strap. Updating the post now to include this info, thank you for the heads up.
DeleteThat is very cute. Great job. :)
ReplyDeleteWhat a sweet little bag! Love the flower and button embellishment. Really adds a special touch!
ReplyDeleteI loved your Tip Me Tuesday link. {thanks girl!} Would you like Tip Junkie to feature your blog post to over 200,000 creative women? If you upload this blog post into your Tip Junkie craft room using at least 2 images, 2 steps, and blog post URL then I can easily feature it in my RSS feed, home page, and all my social networks instantly. {squealing with delight} ~ Laurie {a.k.a. the Tip Junkie}
ReplyDeletehttp://www.tipjunkie.com/post/how-to-add-a-craft-room-project-on-tip-junkie/
Thank you Laurie. Upload is complete.
ReplyDeleteVery cute, Teresa! I especially like the embellishments. Pinned. I hope to see you again tonight at the Retro Re-Pin Party starting at 8 p.m. ET.
ReplyDeleteThank you Julie, I'll be at the party for sure!
DeleteThis is darling Teresa. Wish I had a granddaughter or a great niece to make this for. Thanks for your comment on my blog about my wool appliqued and embroidered pincushion. You are a no-reply, so I couldn't send you an email.
ReplyDeleteThank you Daryl. And thank you for letting me know about the no-reply thing, I had. I'll see if I can fix it!
DeleteSo cute! Definitely making a couple of these for Christmas gifts. Thanks for the tutorial!
ReplyDeleteThank you Lisa! Good luck with your sewing and let me know in case you have any questions regarding the pattern!
DeleteThe pattern is very cute and simple, however I'd like to know the seam allowance. I usually use 1/2", since iI know how to sew; for people who don't, knowing the seam allowance is helpful
ReplyDeleteWhat is the seam allowance?
DeleteHow long did you make the strap? I love this pattern and it is so cute. I am making it for my niece.
ReplyDeleteAh, to be honest I'll have to go back and review my notes, because I made this a while ago, but I think it was about 45 cm long.
DeleteWhat a great design for a purse. Great tutorial, bcuz Im not sure I would remember which tops to leave open, which bottoms to leave open, etc.
ReplyDeleteFor the straps I cut a strip of fabric a bit longer than I wanted the strap to be. I put a length of grosgrain down the middle on wrong side and folded each long side over to middle. and pinned. the first raw edge was concealed by the second raw edge which when folded didnt go all the way to the edge, but rather to the center. I pressed and pinned. Then I got to use one of my fancy stitches and sewed down the middle of the strip. This gave a design to both sides while sewing the raw edge piece in place. The Grosgrain ribbon added strength and some form. Then I folded over the ends and sewed in place.
Would love to see a pic of this! I am making my first one currently. Thanks!
DeleteThat's a great idea, I need to remember it for the next time I make of of these bags! Thank you for stopping by and for sharing your suggestion!
ReplyDeleteCUTE CUTE CUTE put this together this afternoon. Excellent instructions! Will be making more for my granddaughters! Thank you so much for the free pattern
ReplyDeleteThank you, I'm so glad you made it and the pattern worked for you. As I'm the only one testing the patterns before posting them, I'm always afraid they're not well explained for everyone to follow. It's great to get confirmation that they do work!
DeleteThe way I make a strap is to cut a width you like - say 2 inches wide. I used 30 inches long for my 9 year old granddaughter that likes to wear it across her chest. Lay your strip on the ironing board. Fold each long side to the middle just meeting the edges in the center and not over lapping. Press, then fold the strap piece in half again and press. There should be no raw edges showing, now only folds. I top stitch the strap on each side for a finished look. You could use decorative stitches on each edge.
ReplyDeleteThank you Donna! For me straps are always the hardest part of sewing a bag. I'll try your method next time to see if I can make it work.
DeleteI use this technique as well and it makes a very finished looking strap. The beauty is you can make them any width you want.
DeleteGreat little purse pattern....I am going up now to make it!
Thanks for the tutorial. My 4 year old was "helping" me with another sewing project. Then she said, she wanted to make her own bag. We looked on Pinterest and she choose yours! Shortly after that she picked out fabric for the outer part and the lining. Tomorrow we're going to put everything together!!! So, excited. Thanks so much!
ReplyDeleteThis comment has been removed by the author.
ReplyDeleteVery cute bag and easy to follow pattern and directions! I tucked the flap between the lining & outer fabric. Making for two grandnieces and I know they'll love them. Thanks sew much for sharing your talents!
DeleteThank you Karen! It's wonderful to know my pattern is being used!
DeleteI love it. I appreciate the sharing of your pattern. So simple and exactly what I needed to help create the most wonderful bags.
ReplyDeleteI cant find the pattern :(
ReplyDeleteHi, the link to the pattern is in the text below the second picture in the post, where it says “find the pattern here”. In any case, here it is: https://drive.google.com/file/d/0B2_mmyn3aK5weUpSSXJSRnR1dVk/view?usp=sharing&resourcekey=0-bSW8DiD01SlOfo0Vxn7TMA
DeleteGoogle has changed some of the accesses to Google Drive, so sometimes I need to authorized the access, but I always get a message when people request access and give the ok.
This is awesome! Just made for my niece! Took about 2 hours because I added embellishments.
ReplyDeleteI can't find where to download the pattern.
ReplyDeleteHi, you can find the link after the second image of the post or in the second before last sentence of thr post, click on the word "here". I have also replied to a similar comment two comments above yours and included the full linl. Let me know if you still can't find it and I will post it again.
DeleteI must have missed the supply list and the pattern for the pieces...
ReplyDeleteI finally found it.
Delete