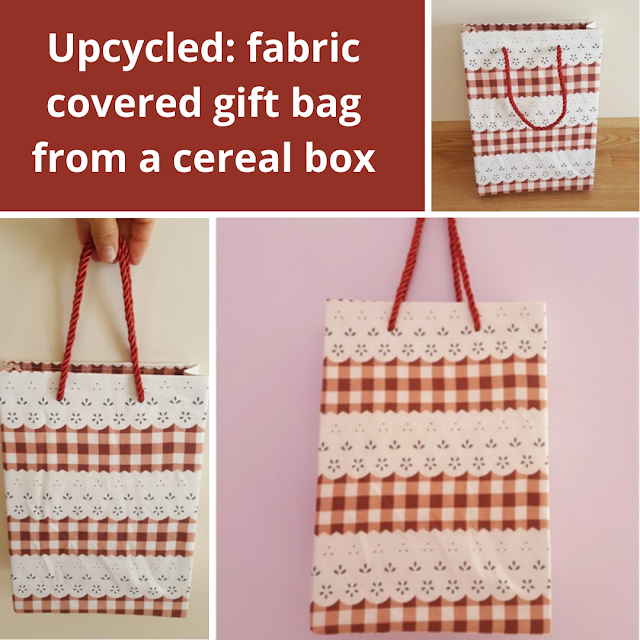
Hello, and welcome! Today is Earth Day, so it's the perfect time to share a great upcycle project. Because we all use gift bags once in a while and we all have cereal boxes at home.
A long time ago I posted a similar tutorial, but I used self adhesive paper instead (you can find it here). This time I decided to use fabric - which is maybe a bit trickier, but makes for a much prettier finishing.
For this you will need an empty cereal box, some fabric (long and wide enough to cover all the box, with an extra margin to spare, and two pieces of ribbon or cord for the handles (slightly longer than the finished size you want the handles to have).
The first step is to cut the flaps at the top of the box, in order to have a clean opening.
Then start gluing the fabric on one of the smaller sides (I like to start here because the overlap of fabric will be less noticeable, especially since you will be folding the sides slightly inward at the end). Don't forget to leave some extra fabric at the top of bag, to fold towards the inside of the box.
(if you noticed above that there's a hem sewn in the fabric I'm using, just ignore it; since this was an upcycle, I used part of what I believe were old curtains, hence the hemming; it's absolutely not necessary for this project to no any kind of sewing).
Glue the fabric all around. If your box has images that will show behind the fabric, add a blank sheet of paper in between the box and the fabric (gluing all the layers).
Once you get to where you started, fold the edge of the fabric inwards and overlap a bit with the fabric already in place (the edge you glued first).
Add some glue on the inside of the box and fold the extra fabric inwards at the top.
Now let's take care of the bottom of your new gift bag. Cut off excess fabric if necessary and then fold (and glue) the smaller sides towards the center first.
Then fold and glue the rest, as shown in the images below:
Measure and mark the placement of the handles. Mine were 2.5 cm from the top of the box and 6 cm from each of the sides. Punch the two holes on each side of the box.
Pass the cord or the ribbon through the holes (use a crochet hook to help, if necessary) and tie a knot on the inside. Repeat in order to have the two handles in place.
Now the final touch: fold the sides of the bag a bit towards the middle, to give it a less boxy look:
And that's it! One original and unique gift bag, entirely made from things you'll most likely already have at home and helping reduce waste at the same time. You'll never throw away a cereal box and you'll never spend money on gift bags again!
Happy Earth Day!


I love it. So creative.
ReplyDeleteHello, this is one of my personal favorites for last week’s Encouraging Hearts and Home. I hope you stop by and say hello, this post has also been pinned to the Encouraging Hearts and Home board! Thank you for being a part of Encouraging Hearts and Home, we appreciate all that you share. Have a great week ahead!
ReplyDelete