
But the fact that they will be truly off school only during the month of August doesn't mean I'm not always looking for new things to keep them occupied and away from the TV, the Ipad and the Wii, of which they have too much already. This time, I came up with the summer activity bag.

It's a very simple bag that you can make in under 20 minutes, to be filled with whatever type of activities your children like best: colouring books, stickers, games, colouring pencils, you name it. And the best things is, they can carry it around by themselves whenever and wherever they want. it's ideal to take on vacation, for long or short road trips, or even for a quick excursion to the grocery store.
All you need is a piece of felt, matching ribbon and four buttons. And whatever you want to use for embellishment, though that's totally optional. This tutorial was based on the bag I made for my daughter, though later I made on for my son too.
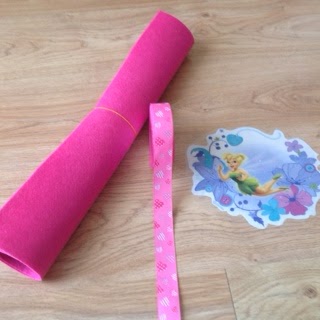
If you're wondering embelishment what I used, it's just a piece of plastic that came from a Tinkerbell backpack that was no longer functional but from which I saved the front panel, because I thought it was too cute to put in the trash (so, in a way, this project also counts as decluttering, since the poor Tinkerbell was locked in my craft closet for longer than it's recommendable, waiting for just the right project to come along).

To make the bag, first you need to fold the felt and cut a rectangle. Size is up to you, depending on the age of the child and what you intend to put inside, but remember you need to include seam allowances for the sides of the bag (not for the bottom, as long as you fold the felt).

If you're sewing an embellishment on, do it before you sew the sides. If you're gluing the embellishments (like I did in the Frozen art bag), order is irrelevant. Fold the felt right sides together (right sides only matter if you added an embellishment anyway), sew the side seams and turn inside out.
This is how mine looked at this point:


Put the body of the bag aside for a second and cut two pieces of ribbon to make the handles (adjust size to the height of the child you are making it for, and depending on whether you want it to be a hand bag or a shoulder bag). Sew a button on each of the edges of the pieces of ribbon:

Now go back to the bag and measure and cut two slits on each side of the bag, near the top, where you want your handles to be. Make sure the buttons can snuggle through the openings.


Button the handles in place and your bag is ready!


Now fill it with the goodies and give it to your kids for them to enjoy!


Have a great week!

This is super cute!
ReplyDeleteThank you Christine!
DeleteAww...this is so cute! :)
ReplyDeleteThanks for joining Cooking and Crafting with J & J!
Thank you Jess!
DeleteThis comment has been removed by the author.
ReplyDeleteGreat tutorial and great idea for a Summer Activity Bag. Thank you for sharing with the Clever Chicks Blog Hop! I hope you’ll join us again next week!
ReplyDeleteCheers,
Kathy Shea Mormino
The Chicken Chick
http://www.The-Chicken-Chick.com
Thank you Kathy!
DeleteWhat a cute and fun craft, so great for the kiddos! I love anything that involves little to no sewing!
ReplyDeleteI don't mind the sewing so much, but it has to come together fast, otherwise it will go on the unfinished projects pile indefinitely... Thank you for stopping by Megan!
DeleteHi Teresa, this such a nice bag you made for holding summer activities for your kids! Thanks for sharing this at Cooking & Crafting with J&J.
ReplyDeleteThank you for stopping by Julie!
DeleteSuper cute! You made that look simple. :)
ReplyDeleteXOXO
I just love this idea, so creatibe! Thank you so much for sharing this on Making Memories Mondays! Hope to see you back Sun night 9PM EST! :-)
ReplyDeleteCathy@threekidsandafish{dot}com
Thank you Cathy! I've linked up to this week's party already!
DeleteI love the way you have put the image on the bag. Thank you for sharing on # wednesdayswisdom
ReplyDeleteThank you Jennifer! Have a great week!
DeleteWow! That looks incredible. I’m so impressed. Pinned and tweeted. We appreciate you stopping by to party with us. We hope to see you, tonight at 7 pm. Happy Monday! Lou Lou Girls
ReplyDeleteThank you Kimberly!
Deletecheck your g+ button it misbehaved for me - pinned and tweeted!
ReplyDeleteGreat craft!! Thanks for sharing on My 2 Favorite Things on Thursday - Link Party!! Hope to see you again this week!! Love having you!! Pinned!!!
ReplyDeleteThank you Elaine!
Delete