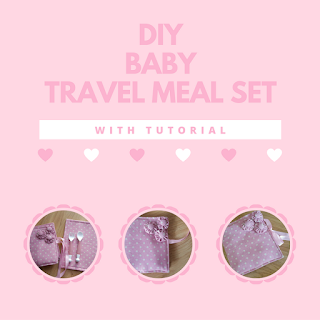
Before Christmas I posted here about the travel meal set I made for my cousin's baby girl. I published the tutorial for the meal set and the tutorial for the placemat, but then life got in the way and I never posted the tutorial for the baby bib that was included in the set.
So, finally, here it is:
So, finally, here it is:
The pattern is a twist on the baby bib I posted here a long time ago, but this time I added a pocket.
You can find the updated pattern here. Basically you need to cut two pieces of the bib "body" (front and back) and two pieces of the pocket (again, using your main fabric and your lining. My advice? Forget about the lining and buy a soft small towel to use instead. This way, if you use the edge of the towel to cut the pocket like I did, you can just cut one piece and be done with it).
Materials needed:
- fabric for the front and lining of the bib and pocket. See above my suggestion to use a towel instead of lining.
- two buttons (I used fabric covered buttons)
- a piece of thin elastic, preferably in a coordinating color (alternatively, you can skip the buttons and the elastic and use a snap instead)
I didn't have time to take enough pictures to create a photo tutorial, but here are the main steps:
1. Pin pocket in place over the front side of the bib (if you're using a lined pocket instead of just the towel, sew first the top of the pocket, placing both pieces right sides together, and then turning inside out after sewing. There's no need to sew the sides of the pocket, just the top, but you should press the seams for a neater finishing).
2. Place the back piece of the bib (in my case, again, cut from the towel) right sides together
3. Sew all around, leaving a small opening on the side or the bottom, to turn inside out. I like to leave the openings at the bottom, but in this case with the towel plus the pocket, it was too bulky and I preferred to leave the opening on one side, right above the pocket.
4. Turn inside out, sew the opening shut and press. Top stitch all around if you want. I opted to leave it as it was.
5. Fold the elastic and sew the raw edges at the tip of one of the top "arms" of the bib. Sew a button on top, to hide the seam and the edges of the elastic. Sew the other button on the other "arm", so that when you loop the folded side of the elastic over the button you are closing the bib.
For the DIY travel meal set and the DIY placemat tutorial, click below:
For the original baby bib pattern (no pocket + snap instead of elastic), click below:
For the original baby bib pattern (no pocket + snap instead of elastic), click below:


Aw, that is such a cute set! How wonderful to have such a beautiful and useful homemade gift. Thanks for sharing with us at Together on Tuesdays!
ReplyDeleteThank you, for hosting and for stopping by!
DeleteThat's so easy!! Now I need someone with a baby I can make it for! Pleasures of the NW's DIY party!
ReplyDeleteYes I know how it feels. Since I will have no more babies of my own, I'm having a lot of fun making things for my little cousin!
DeleteOh this is so cute!! :)
ReplyDeleteI would love for you to share this with my Facebook Group for recipes, crafts, tips, and tricks: https://www.facebook.com/groups/pluckyrecipescraftstips/
Thanks for joining Cooking and Crafting with J & J!
Thank you Jess, for hosting and for the invitation. Shared!
DeleteOh, I Love these Bib Sets! The colors and patterns are so adorable :) Thanks for sharing your post with us at Together on Tuesdays. I look forward to seeing more of "keeping it real"
ReplyDeleteNice job. Visiting from Bloggers Pit Stop.
ReplyDeleteThat has to be the cutest bid sets I have seen. How lovely and creative. Thanks for sharing this with us.
ReplyDeleteKathleen
Bloggers Pit Stop
It was really insightful.
ReplyDeleteThanks for such a nice content.
Cheers
BTW if anyone interested more have a look Click here thanks