I have a problem with most reusable shopping bags. Or rather, several problems. They are either ugly or contain company logos (or a combination of both) and never last too long. Or they are too big. Or they unfold themselves when they shouldn't and then are a pain to fold back.
So, for a while now, I've been brainstorming a way to make a cute, cheap reusable bag that I can fold and keep in my purse.
So, for a while now, I've been brainstorming a way to make a cute, cheap reusable bag that I can fold and keep in my purse.
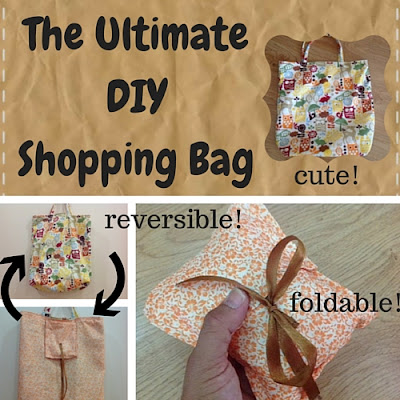
Well, finally, the ultimate DIY is out in the open. Complete with instructions and one zillion pictures to show you how it's made.
This shopping bag comes together pretty quickly, it's easy to sew, reversible (if you don't mind one little pocket on the outside) and folds itself into a little cute pouch that perfectly fits your purse!
Want one? Here's the tutorial.
To make this reusable shopping bag you will need:
Step 1 - sew the bag
Pin the two pieces of exterior fabric right sides together and sew around both sides and the bottom.
Fold the bottom corners to form a triangle and measure about 6 centimeters...
...sew a line over the measurement you made...
...and cut off excess fabric:
Do the same with the other corner. This will give the bag a flat bottom when you fold it inside out.
Repeat these steps for the lining fabric.
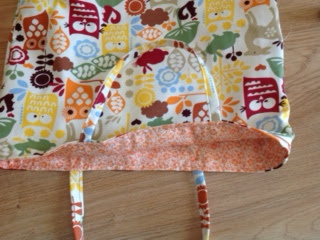
Turn the exterior piece of the bag inside out and place the lining inside, wrong sides together. Line up the side seams. It should look like the picture below:
Step 2: create the handles
The usual way to to this is fold the handle pieces in half, sew them right sides together and then turn them inside out. I hate having to turn thing strips of fabric inside out, so I usually make the handles using the bias tape method.
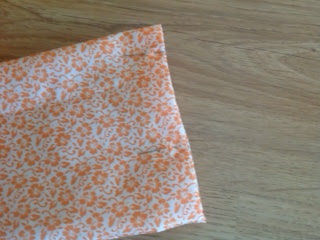
Fold both edges over and iron them as shown...
and then fold in half and press them flat:
Top stitch and you're done. Use which method you prefer and do the same with both handle pieces.
Step 3: Make the pouch
Place both rectangles of fabric right sides together, with one of the ribbon pieces tucked in between, centered over one of the smaller sides:
Sew around the two longer sides and the smaller side which has the ribbon in place. Leave the fourth side open.
Fold inside out through the opening, fold the edges towards the inside, pin and top stitch, effectively closing the opening.
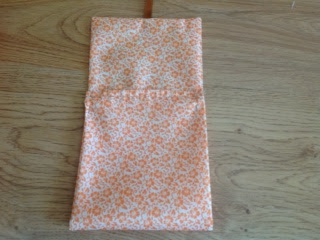
Fold the piece as shown and pin the sides in place.
This shopping bag comes together pretty quickly, it's easy to sew, reversible (if you don't mind one little pocket on the outside) and folds itself into a little cute pouch that perfectly fits your purse!
Want one? Here's the tutorial.
To make this reusable shopping bag you will need:
- two large rectangles of exterior fabric (mine were 50 x 45 cm)
- two rectangles of the same size for the lining (you can use the same fabric or a contrasting one like I did)
- two strips of fabric (about 6 x 30 cm) for the handles (I used the same as the exterior fabric, but it's your choice)
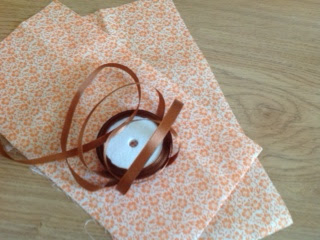
- two smaller rectangles (about 15 x 45 cm) of one of the fabrics for the pouch (I had to use my lining fabric because I didn't have enough of the other one) and two pieces of ribbon (each about 20 cm long).
Step 1 - sew the bag
Pin the two pieces of exterior fabric right sides together and sew around both sides and the bottom.
Fold the bottom corners to form a triangle and measure about 6 centimeters...
...sew a line over the measurement you made...
...and cut off excess fabric:
Do the same with the other corner. This will give the bag a flat bottom when you fold it inside out.
Repeat these steps for the lining fabric.
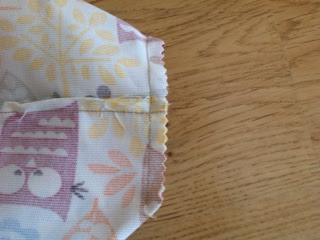
Turn the exterior piece of the bag inside out and place the lining inside, wrong sides together. Line up the side seams. It should look like the picture below:
Step 2: create the handles
The usual way to to this is fold the handle pieces in half, sew them right sides together and then turn them inside out. I hate having to turn thing strips of fabric inside out, so I usually make the handles using the bias tape method.
Fold both edges over and iron them as shown...
and then fold in half and press them flat:
Top stitch and you're done. Use which method you prefer and do the same with both handle pieces.
Step 3: Make the pouch
Place both rectangles of fabric right sides together, with one of the ribbon pieces tucked in between, centered over one of the smaller sides:
Sew around the two longer sides and the smaller side which has the ribbon in place. Leave the fourth side open.
Fold inside out through the opening, fold the edges towards the inside, pin and top stitch, effectively closing the opening.
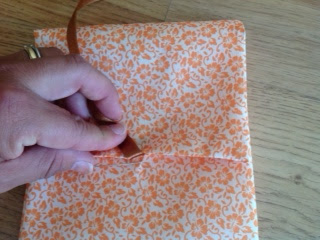
Then fold over the top, pin, and then sew the other piece of ribbon in place.
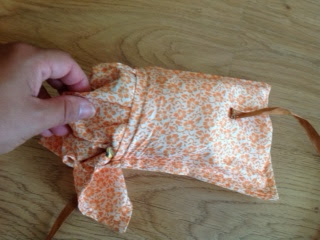
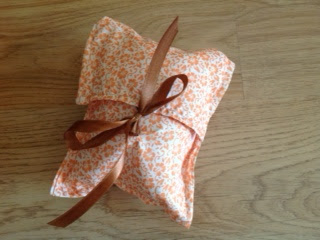
You'll have to unpin the sides to sew the ribbon, and then pin them back again to stop stitch all around, creating a lined pouch that looks like this when closed:
Step 4: assemble the bag
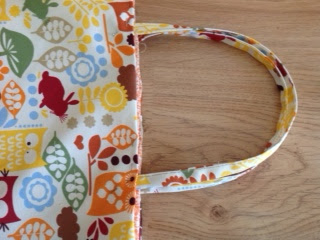
Go back to the the pieces you left ready at the end of step one and fold over the edges, pinning all around and tucking the handles in between, carefully centered:
Top stitch all around:
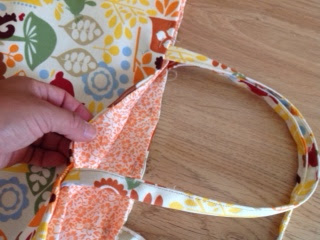
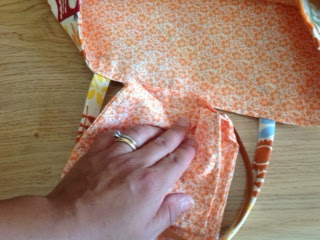
Now place the unfolded pouch as shown over one of the sides of the bag.
This is the only tricky part of the whole process, that you need to get right, otherwise your bag won't fold over inside the pouch. The top of the pouch should be pointing towards the bottom of the bag and the opening of the pouch should be facing down, lined up with the stitches you've just made around the bag (lining up like this is essential to make sure you don't accidentally sew the opening shut). The bottom of the pouch will be hanging outside the bag for now.
Top stitch around the bag again, about half a centimeter below your previous seam...
...securing the pouch in place:
This second seam will make sure the handles are sturdy enough, effectively attach the pouch to the bag and a double seam always looks more professional on a bag anyway.
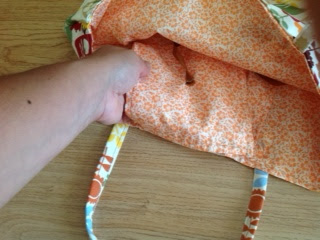
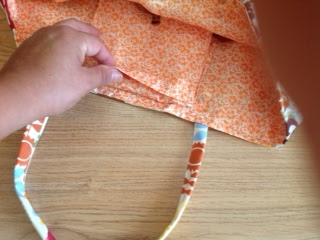
When you fold over the pouch piece, it should look like this, a small pocket attached to the inside of the bag:
Step 5: go shopping!
Your bag is ready!
Fold it over as shown and put it in the pouch. The bag needs to be turned inside out to fit into the opening of the pouch.
Place it in your purse and when you need it, you just open the pouch, fold it out again and use it!
...or you can use it like this if you don't mind having the pocket on the outside because other than that, the bag is totally reversible:
And the best...it fits the palm of your hand!
This also makes a wonderful handmade gift and I'm already thinking about sewing a batch of them for Christmas.
And seriously, it took me longer to write this post than to actually make the whole bag from scratch! Whew!
I hope you enjoy this tutorial and have a wonderful week!




















Wow very cool bag and very good tutorial! Thanks.
ReplyDeleteThank you Mary!
DeleteI am loving that owl fabric!
ReplyDeleteI love it too. I used all of it for the bag but I'm wondering if the store where I bought it still has more of it. It's really cute.
DeleteSmart idea.
ReplyDeleteThank you Joy!
DeleteWow this is really nice and you did a great job making it.
ReplyDeleteThanks for sharing it at Cooking and Crafting with J & J.
Thank you Julie!
DeleteOh, how I love sites with clear directions and photos or illustrations that match those directions!
ReplyDeleteThis is a lovely bag, and looks like it will make a great gift. I'm giving it a try!
Thank you for stopping by Carolyn! I hope the tutorial is clear enough, but let me know if you have any problems. Good luck!
DeleteOH my gosh...this looks SO CUTE! I love it!
ReplyDeleteThanks for joining Cooking and Crafting with J & J! Please don’t forget to enter the $25 Starbucks Giftcard Giveaway that ends tomorrow night!
Thank you Jess, have a wonderful weekend!
DeleteYour explanation is so clear, Teresa.
ReplyDeleteMost of my sewing projects back when I was active were bags. I love them and this idea is lovely.
Thanks tons for it on #TipTuesday!
Thank you Debbie!
DeleteGreat little bag and a very well explained tutorial - thanks for sharing it with us Teresa! The reversibility makes it extra fun.
ReplyDeleteThank you Lara!
DeleteI'm going to try this one--would make a great gift.
ReplyDeleteGood luck! Let me know if you have any questions!
DeleteYou've made a sweet, gorgeous bag - Love the fabrics you've used.
ReplyDeleteThank you Elaine. I particularly loved the owl fabric, but I had just a small piece and used it all for the bag...
DeleteSuper cute! Pinned and tweeted. Thanks for stopping by and partying with us! I hope to see you on Monday at 7 pm, so we can pin and tweet your masterpieces! Lou Lou Girls
ReplyDeleteThank you Kimberly, I'll be there!
DeleteThis is a really cute and versatile tote! And your tutorial is easy to follow along. Thank you for sharing it on #HomeMattersParty.
ReplyDeleteThis amazing post is being featured on my blog today as part of Tuesdays with a Twist blog hop:
ReplyDeletehttp://www.godsgrowinggarden.com/2015/09/time-to-link-up-tuesdays-with-twist-128.html
Thanks
Angie
Thank you Angelique! I left a comment on your blog as well!
DeleteI love how cute this is! I wish I was more of a sewer than I am now! I can hem pants that about as far as it goes! Thank you for linking up with us at the Tips and Tricks Link Party! I hope to see you back this week!
ReplyDeleteThank you Gabby!
DeleteSuper cute!! Thanks for sharing on My 2 Favorite Things on Thursday...hope to see you again this week!! Pinned!
ReplyDeleteThank you Elaine!
DeleteThe fabrics you used are so cute and I love that it folds up! thanks for sharing with SYC.
ReplyDeletehugs,
Jann
Thank you Jann! Have a wonderful weekend!
DeleteGreat idea to add the storage pouch, Teresa!!!
ReplyDeleteThank you Pam, I've been finding it very useful to keep the bag duly folded in my always messy purse...
DeleteReally awesome! I now have next year's Christmas gifts for my 5 daughters covered! This year they get canned pear preserves and bath towels with their names embroidered on them. I love to plan ahead!!! Very useful gift!!
ReplyDeleteThank you Patricia, I'm glad you enjoyed it! I'm making these bags for Christmas gifts as well!
DeleteFantastic idea & tutorial ��
ReplyDeleteThank you! Happy new year!
DeleteHey there, just stumbled across this and I love how easy it is. I have a fabric panel 50x50cm and so I'm thinking about making a shopping bag from it for a friend. Did you count the dimensions for the pocket/pouch or was that try-error system? :) In case I make a bigger one sometimes hehe. Thanks!
ReplyDeleteKeep up the good work , I read few posts on this web site and I conceive that your blog is very interesting and has sets of fantastic information. 성인용품도매
ReplyDelete