First, choose your basket and fabric for the lining. I used a square basket but the tutorial works well for rectangular or round baskets too.
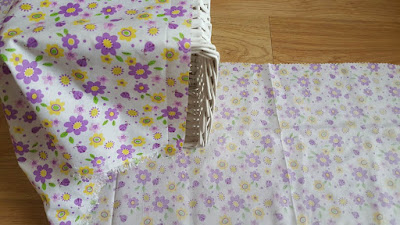
Place the basket on top of the fabric and trace the bottom with chalk or disappearing ink. By tracing the outside of the basket, you are automatically creating your seam allowance. Cut the bottom piece of the lining.
Then cut a piece of fabric wide enough to go around the outside of the basket and high enough to fold over the edge. This will be the side lining.
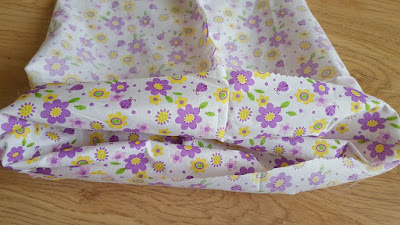
Sew the short edges of the side lining right sides together, and then pin the sine lining piece to the bottom of the lining (right sides together), creating little pleats at the corners.
Sew all around.
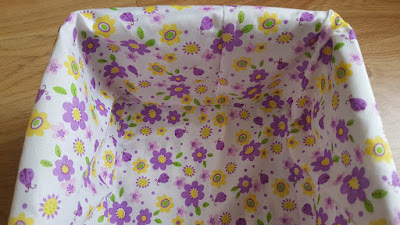
Test your lining. It should perfectly fit the inside of the basket. As to the folded part, you have three alternatives: (i) fold it over again to hide the raw edge, (ii) sew a simple hem or (iii) add a bit of lace or a cute ribbon.
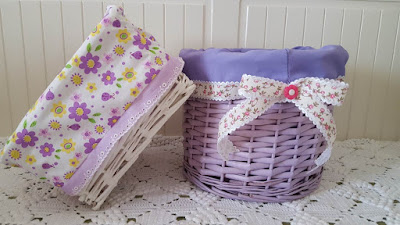
I decided to sew a purple lacy edge I had in my stash.
And you're done, you've created a simple but pretty lining for your basket!
Here's the finished product, side by side with the other basket I embellished for spring:
This is also great to create gift baskets: buy an inexpensive basket, add a cute lining, fill it with goodies and you have a lovely gift.
Happy Monday!


Very pretty! I think my liner sewing would take a lot more than 15 minutes. ;) Visiting from Really Crafty Party.
ReplyDeleteWell, in this case you can make it pretty quickly because you literally cut the corners, so the lining sides are just one piece. Thank you for stopping by!
DeleteOh, I really want to learn how to sew, so I think this might be a good beginner's project!
ReplyDeleteYes, I think it's a great beginner project. Good luck with your sewing!
DeleteThese would make lovely gift-baskets indeed. Thank you for sharing the how-to! Must keep it in mind!
ReplyDeleteHave a great week, dear Teresa,
Marjan
Thank you for stopping by, and have a wonderful week too!
DeleteWhat an easy tutorial. And the baskets are so adorable.
ReplyDeleteThank you Cristina!
DeleteSo easy!! Thanks for sharing on the Pleasures of the NW's DIY party!!
ReplyDeleteThank you for hosting and for stopping by!
DeleteThank you Jess! Shared!
ReplyDeleteHi Teresa,
ReplyDeleteWhat a great tutorial! I am hosting a baby shower later this summer and this may be just the ticket. ~smile~
Roseanne
Thank you, and good luck with the baby shower!
DeleteLovely basket. Makes me wish again I could sew more. Thanks for sharing at #HomeMattersParty
ReplyDeleteThank you Donna!
DeleteI love this project, perfect for using that pretty piece of fabric that's been waiting to be used. Thanks for sharing with us at Creatively Crafty #ccbg :)
ReplyDeleteThank you Lydia, for hosting and for stopping by!
DeleteHi Teresa,
ReplyDeleteThis looks so easy to do. I wish I had a sewing machine. I really love the decorated on for Spring. Congratulations on being featured on Healthy, Happy Green & Natural blog hop. Pinned & tweeted!
Thank you for the feature Marla. I haven't been to the blog hop yet this week. Heading over now.
DeleteThis is such a cute project. I love how easy it is to do. Pinning to my sewing board. Thanks for sharing.
ReplyDeleteThank you Leanna!
DeleteThese turned out so cute. Thanks for sharing on Sunday's Best. I love makeovers!
ReplyDeleteThank you, for hosting and for stopping by!
DeleteYou make sewing a liner for a basket so easy. Excellent tutorial. Thank you for sharing at the Snickerdoodle Create~Bake~Make link party! I am featuring your basket liner tomorrow at Snickerdoodle. Pinning.
ReplyDeleteThank you for hosting, and for the feature!
Delete