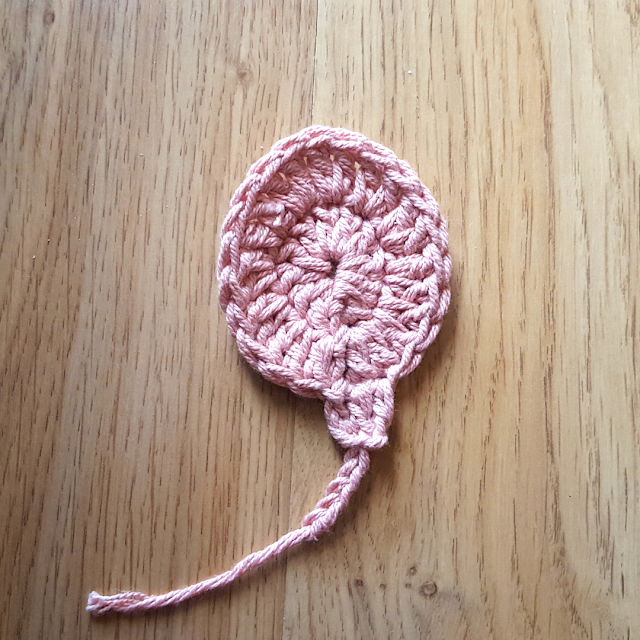
Hello, and welcome! I haven't had a lot of time to craft lately and so I've been mostly focusing on quick and easy projects, in particular those that I can start and finish in the same day, to avoid adding even more stuff to the unfinished projects pile...
This crochet balloon comes together in about five minutes, it's perfect to use up yarn scraps and you can use in a lot of different ways: as an applique, to create a decorative garland, to make a brooch...
I used a soft cotton yarn and a 4.5 mm hook, but you can adjust the yarn and the hook to what you have on hand, the only difference will be the finished size of the balloon.
I didn't take photos of the process (no time, sorry), but here's the pattern if you want to replicate it.
Row 1: on a magic ring, chain 3 (counts as a stitch) and then add 11 double crochets into the ring (12 stitches in total). Join with a slip stitch.
Row 2: chain 3 (counts as a stitch).
Add one double crochet in the same space and two double crochets over
each stitch from the previous row (24 stitches in total).
To create the neck of the balloon, chain 3 (counts as a stitch) and then add one double crochet over each of the next two stitches from previous row.
If you don't want to add a bit of cord to the balloon, then you're done at this point. Cut the yarn and weave in the ends.
To add the cord (as shown in the image below), turn your work around, slip stitch once (to get you to the middle stitch of the balloon), and then add as many chains as you want. Cut the yarn and weave the end (or not, as you prefer).
Of course when you follow this pattern you will have more of a circle than an oval, but it's easier to pull the top of the balloon a bit up (this is what I did before taking the picture above, and the shape held up just fine) than to change your stitches. You can always block it to shape but if you're gluing or sewing the balloon somewhere else, there's really no need to do it.
I made this balloon with a specific idea in mind, which I'll share here on the blog sometime next week.
Until then, have fun, and happy Wednesday,
As an Amazon Associate I earn from qualifying purchases.

.png)


No comments:
Post a Comment