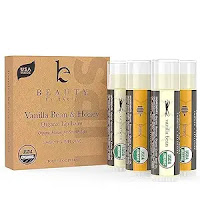
Hello, and welcome! Today I'm sharing a very useful little project. Because yes, we all tend to use a lot of lip balm during the winter months, but hydration and protection of the lips is also very important in the hot weather.
And because my daughter tends to be a disaster when placing (or misplacing) her lip balms, I came up with a way to keep them always around - whether on a keychain, hanging from a purse or backpack or even passed through a belt loop: the lip balm keychain cozy.
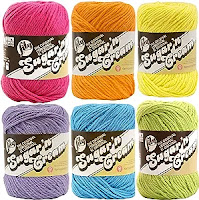
It's very quick to make - you'll have one ready in about 15 minutes. And it's a great idea to use up yarn scraps too. Here's the tutorial:
Bottom: chain two over a magic ring. Then add 11 double crochets (to get 12 stitches in total). Join with a slip stitch. Pull the loose end of the yarn to close the magic ring.
Rows 1 - 12: chain one, and then add one single crochet over each stitch from the previous row (12 stitches in total). Slip stitch to join.
Flap: without breaking the yarn, chain one and then add four more single crochet stitches (5 stitches total). Turn around and repeat the process until you have 5 rows in total (add more rows if you want a longer flap).
Button hole: slip stitch in the center of the edge of the flap. Chain 5 and slip stitch again on the same stitch (you may need to adjust size of the hole depending on the button you are planning to use).
 |
| https://amzn.to/48nNWQh |
By now if you sew a button you already have a functioning lip balm cozy:
Keychain loop: find the centre where the flap meets the body of the lip balm cozy. Slip stitch, chain ten and slip stitch again on the same stitch.
Weave in ends, sew a button in place (if you haven't before), insert a key ring through the loop and you're done!
Now have fun making lots of these - they are useful and make great little gifts and party favours too!
Happy Tuesday and stay safe,
This post may contain affiliate links. As an Amazon Associate I earn from qualifying purchases.
 |
| https://amzn.to/47pSxjt |


These lip cozy's are so adorable and would make great gifts.
ReplyDeletethey look so cuteeee!!!! ....... thanks for the sharing..... am definitely gonna make one!!!! 😊
ReplyDeleteThank you! Let me know how the pattern works for you, I'm always in doubt if I write them clearly enough.
DeleteThese lip balm keychains are so lovely! Thank you so much for your tutorial. Pinned!
ReplyDeleteThank you!
DeleteSuper sweet, a lovely gift when you just need a 'little something' for someone!
ReplyDeleteYes, they are great little gifts. Thank you for visiting!
DeleteSo cute! Thank you for sharing at Party In Your PJ's.
ReplyDeleteThank you for hosting and for stopping by!
DeleteWhat an incredibly cute and clever project! The cozies look super adorable, and once you think about how easy it is to misplace lipbalm in a backpack or purse, making these is a no-brainer. Thanks for sharing this write-up :) I've taken the liberty of making you a Pinterest image at https://www.allievane.com/kcp to make this tutorial easier to share.
ReplyDeleteThanks so much for linking up with me at my #UnlimitedMonthlyLinkParty 13, open June 1 to 26. All party entries shared if social media buttons installed.
ReplyDeleteThank you, for hosting and for stopping by!
DeleteWhat size hook and yarn. These are just too much!
ReplyDeleteHi, these were made using scraps of recycled cotton yarn I buy locally, and I used a 3.5 mm hook. Good luck for your projects!
DeleteI made it! So exciting, I’m such a beginner. At the end of the flap do I tie off and start again in the middle? I don’t know how to get to the middle.
ReplyDeleteYes, you can cut the yarn, find the middle and start there, but then you will have more yarn ends to weave in. If you can manage it, slip stitch until you get to the end and then add the necessary stitches, and that way you save some weaving in ends. Good luck for your crochet projects! (sorry, I have no idea why I’m not able to log on to comment, but if you have any other questions just leave them here or send me an email using the links at the top right of the page)
DeleteI’m so glad I asked. I ssed my way to the middle. Came out great. Thank you so very much.
Delete