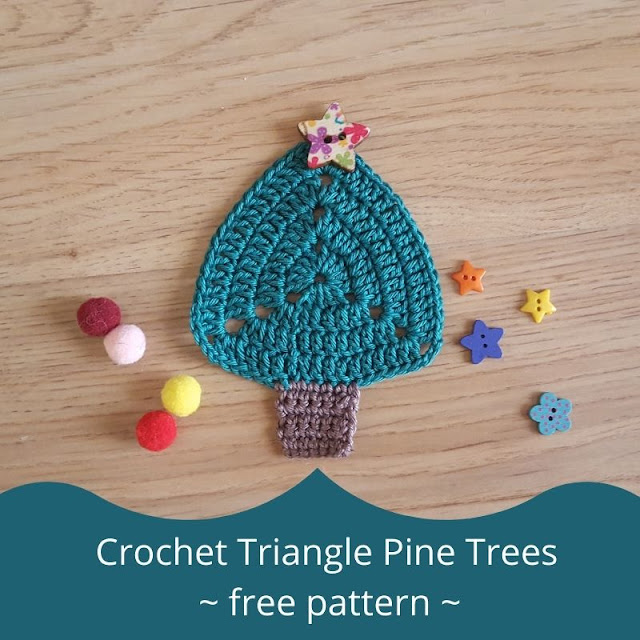
Hello, and welcome! I know I'm not the best when it comes to decorating for each season, but this year I've been on a roll trying to get rid of all my yarn scraps - these pine trees where just perfect for that. Not to mention, of course, that they will make cute winter decor.
I still haven't decided if I'm going to make a garland or if I will be using them as ornaments (or maybe both, but here's the free pattern in case you want to make some yourself
The pattern is very easy and the pine trees come together pretty quickly.
The pattern is very easy and the pine trees come together pretty quickly.
All you need is some green and brown yarn and a crochet hook. I used 100% cotton yarn and a 2.5 mm hook. My pine trees are about 8.5 cm wide by 11 cm high (around 3.3 x 4.3 inches).
Row 1: Use your green yarn. On a magic ring, chain 2 and add 4 more double crochets into the ring. Chain 3. *Add 5 double crochets into the ring, chain 3.* Repeat the pattern between * one more time, to create a triangle. Pull the yarn to close the ring and slip stitch to join.
Row 1: Use your green yarn. On a magic ring, chain 2 and add 4 more double crochets into the ring. Chain 3. *Add 5 double crochets into the ring, chain 3.* Repeat the pattern between * one more time, to create a triangle. Pull the yarn to close the ring and slip stitch to join.
Slip stitch to join. You will be left with a triangle with 9 stitches on each side, plus the chains in the corners.
Row 3: chain 2, double crochet over the following stitches from previous row. In the corner *add 2 double crochets, chain 3, add two more double crochets.* In each of the following two sides of the triangle, add 9 double crochets over the stitches from previous row and repeat the pattern between * in each of the corners. Add the 2 single crochets left to complete the first side, and slip stitch to join.
You will be left with a triangle with 13 stitches on each side, plus the chains in the corners.
Row 4: chain 2, double crochet over the following stitches from previous row. In the corner *add 2 double crochets, chain 3, add two more double crochets.* In each of the following two sides of the triangle, add 13 double crochets over the stitches from previous row and repeat the pattern between * in each of the corners. Add the 4 single crochets left to complete the first side, and slip stitch to join.
To make the tree trunk, choose one of the triangle sides and add 7 single crochets in the middle (since each side has 17 stitches, not counting the corner chains, you will be leaving 5 stitches on each side of the trunk).
Turn around, chain 2 (the first chain doesn't count as a stitch) and add one single crochet over each stitch from previous row (7 stitches total).
Add four more rows of single crochets, for a total of six brown rows. Weave in ends and your little pine tree is ready.
Once your pine trees are done, you can use pompoms or buttons to decorate them for Christmas...
Have a wonderful week and happy crafting!


These crocheted trees are adorable and would make great ornaments. Thanks for the pattern.
ReplyDeleteThank you Julie!
DeleteSo easy and quick to do! Perfect for ornaments, gift tags or the front cover of a holiday card.
ReplyDeleteAlexandra
EyeLoveKnots.com
Thank you Alexandra!
DeleteThese are brilliant, I love a good stash buster! These will be one of the features at Handmade Monday this week :-)
ReplyDelete